
 CRE Agents
Team and seats
Invite people to CRE Agents, group them into departments with their own catalog menus, make someone an admin, or remove a seat.
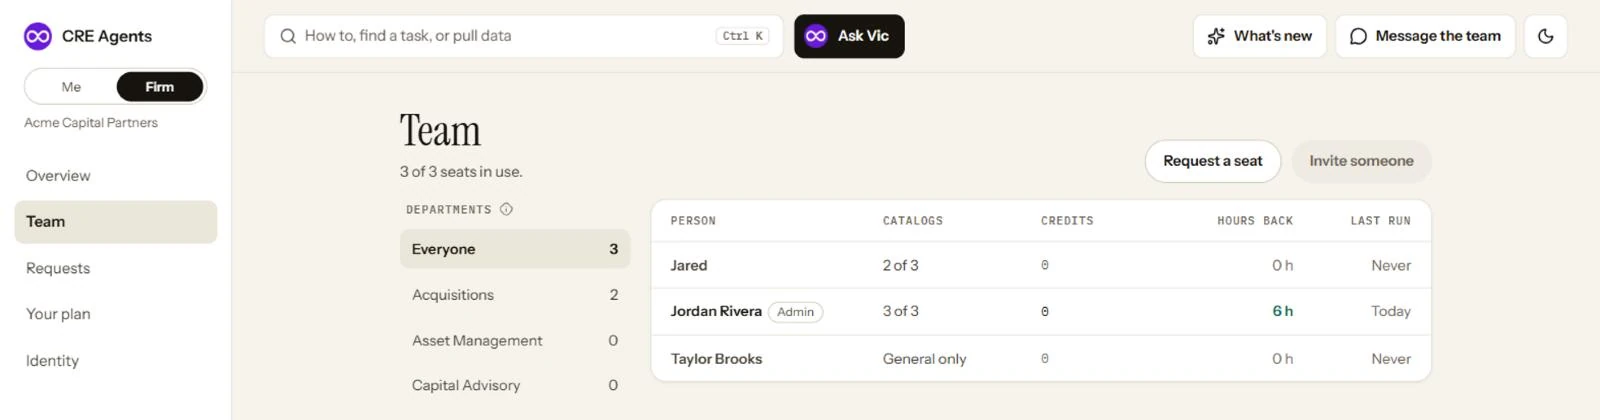
Invite someone
Section titled “Invite someone”-
On Team, click Invite someone.
-
Enter their email, name and job title, pick their department, and pick Member or Admin.
-
Click Send invite. They get an email to connect their AI.
The same row is in firm setup, where you can also Upload a CSV of people.
Departments
Section titled “Departments”A department is a group of people with its own menu of catalogs. People in it choose their catalogs from that menu, up to the number your plan allows per seat. Anyone not in a department picks from the firm’s full menu.
To make one, click New department under Departments, name it, and pick the catalogs for its menu.
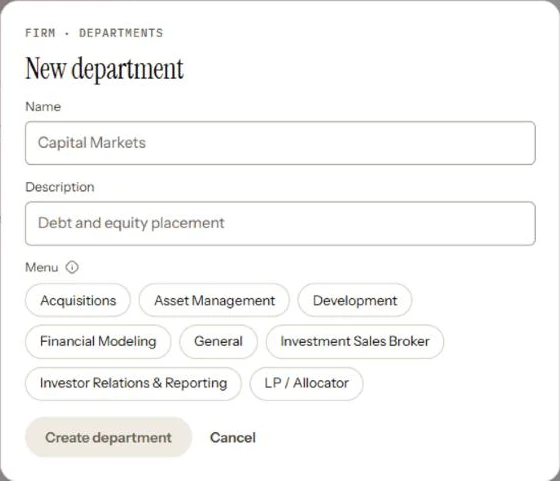
Deleting a department moves its people to the firm’s full menu. Nobody loses a seat.
One person’s seat
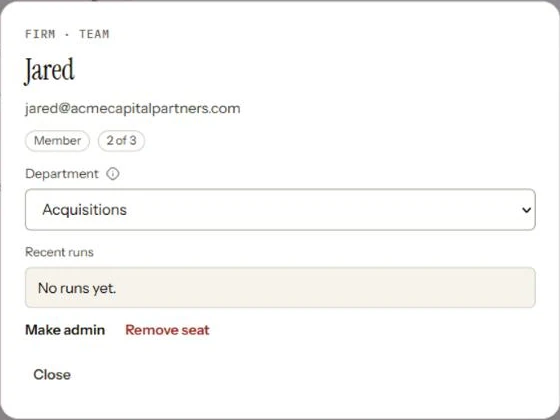
Section titled “One person’s seat”Click anyone in the table to open their seat. From there you can move them to a department, see their recent runs, make them an admin (or a member again), or remove the seat.
Next steps
Section titled “Next steps”© 2026 CRE Agents. All rights reserved.
AI can make mistakes. Please double-check responses. Not tax, legal, or investment advice.